The Remote Debugginator (2015)
The Remote Debugginator is a device created for the Acacia Irrigation Project to enable remote access to a LAN network over 3g.
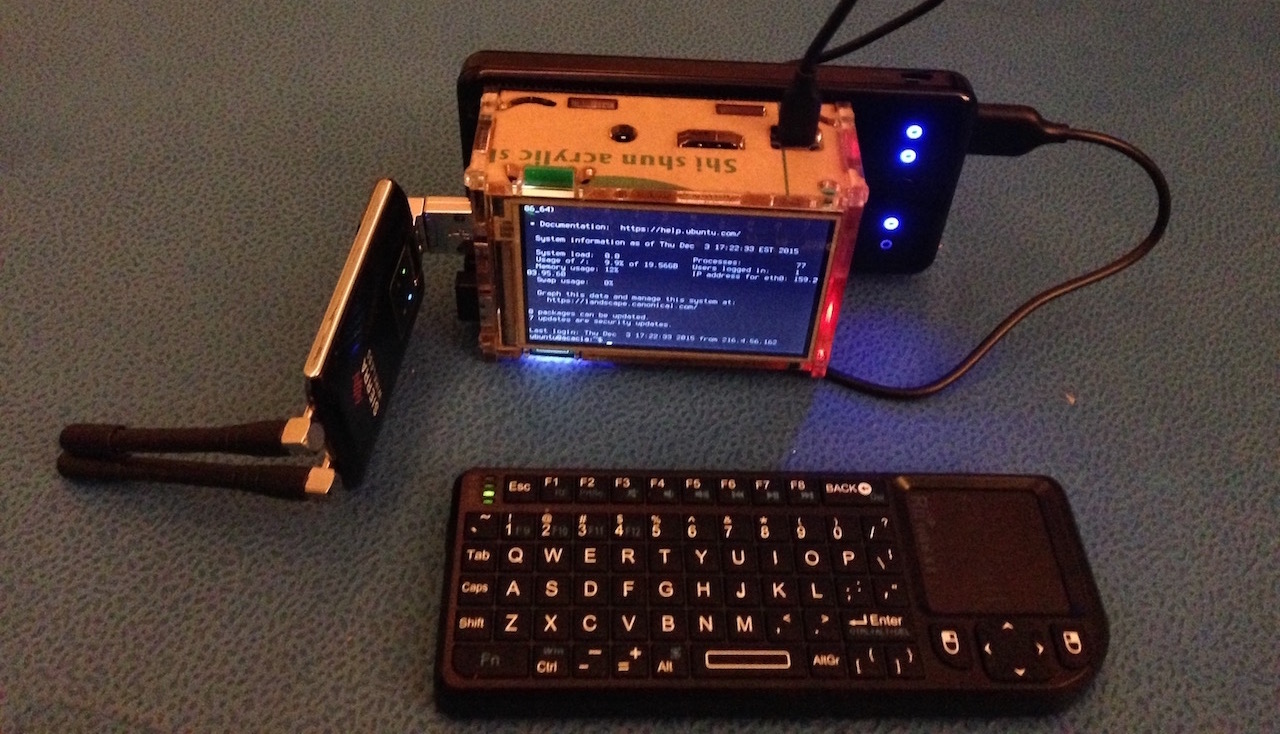
We have three irrigation sites serving about 20 farmers’ fields. Each of these sites has a Raspberry Pi collecting data on sunlight, temperature, power consumption, and pump usage.
While working on the the project we encountered a lot of difficulty debugging and collecting data from our irrigation sites remotely.
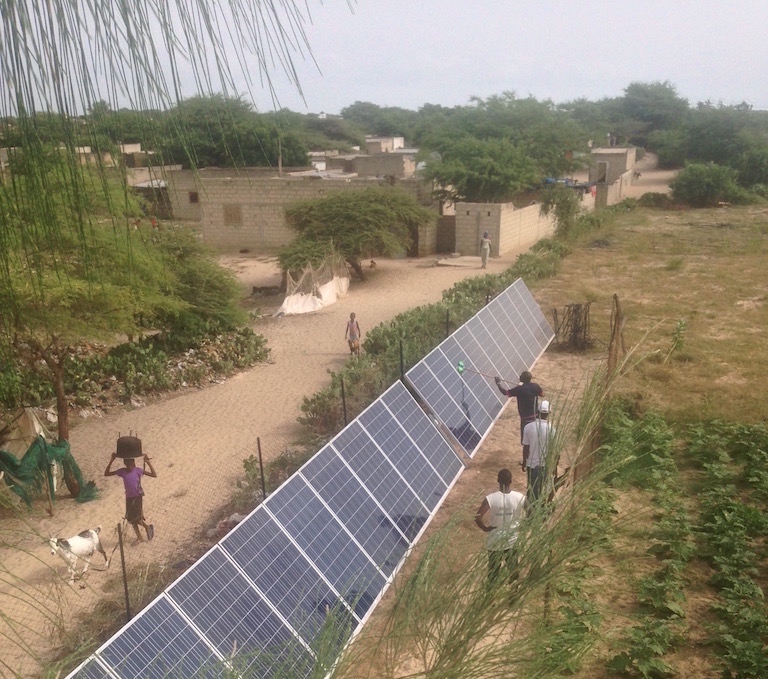
Collecting data takes a lot of effort. Typically we drive to our sites from Louga (where we are staying) which takes about 45 minutes each way. It’s not an easy drive, especially after the rainy season in Senegal.

The road is extremely sandy and frequently littered with deep potholes where the asphalt has collapsed into the soil.
This is where the Remote Debugginator becomes useful. All we need is to have a farmer turn the device on near the irrigation system and we’re good to go.
Parts list
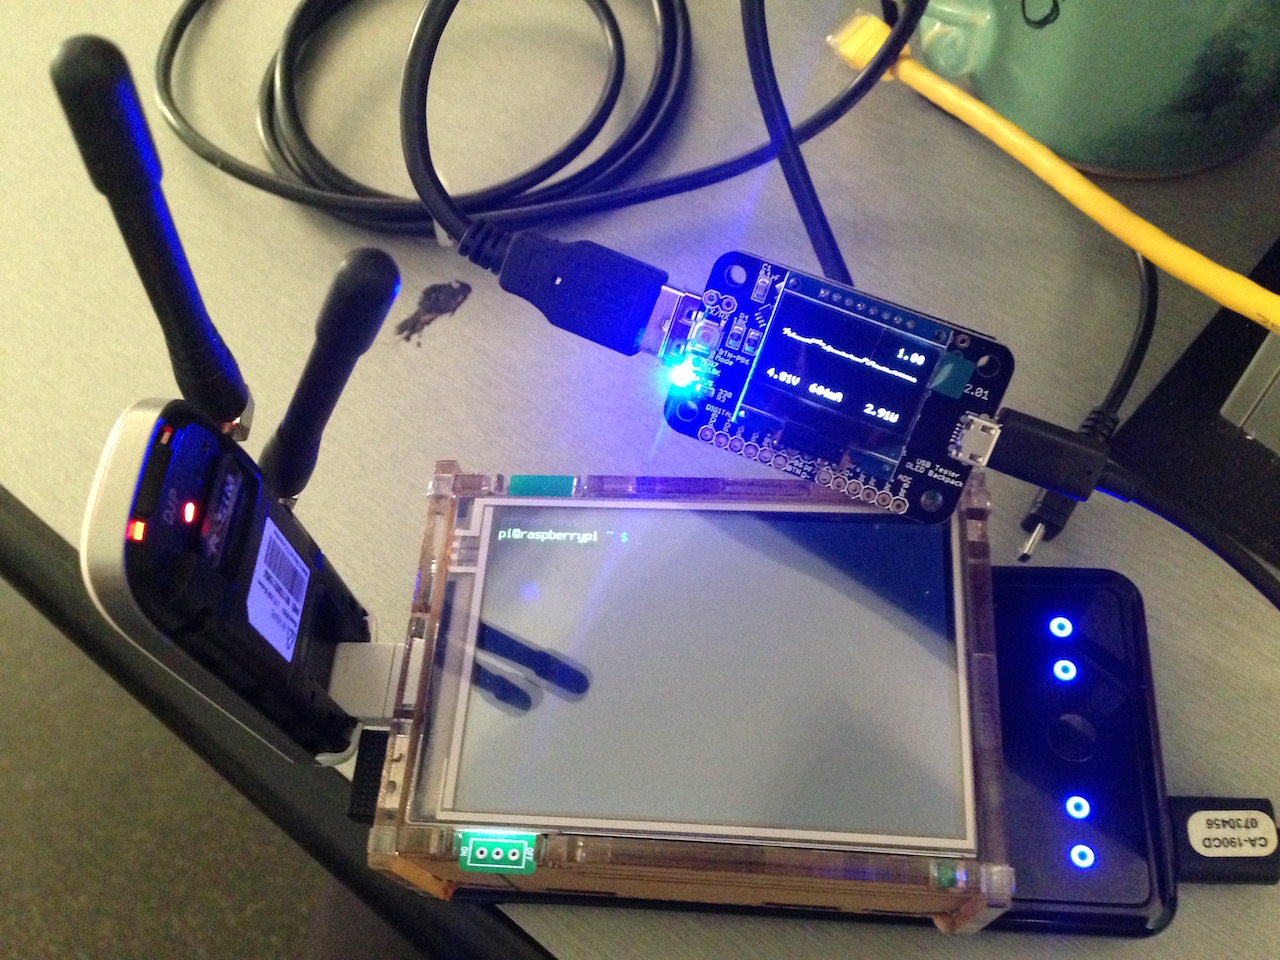
- Raspberry Pi Kit
- If you don’t want to get a kit, make sure to buy a version 2, as it can provide more power to USB devices
- Case + Screen for RPi
- USB battery pack (10000 mAh)
- 3g USB dongle
- Linux compatible dongles
- Make sure to check for cell provider support
- Portable keyboard
- Digital Ocean instance
- M2M Sim card. Here are some providers:
Raspberry Pi setup
The Pi was set up using the default Raspbian distro.
Setting up screen:
Connecting to wifi via command line:
Preventing Edimax wifi adapter from sleeping during shell sessions when idle:
Booting directly into shell:
Booting up
After booting, the Pi will need to:
- Connect to 3g
- Set up the reverse tunnel
- Re-connect automatically to 3g or tunnel
We run the 3g and tunnel shell scripts in separate screen windows. This makes it easier to debug should a problem occur.
Setting up scripts:
sudo apt-get install screen
Add the following to ~/.screenrc. This enables the remotely logged in user to access the screen session.
defshell -bash
multiuser on
acladd pi
Add the following to ~/.bashrc. This starts run.sh only when the Pi boots up and not when someone connects via SSH or screen. If anyone has a better way to do this I’m all ears.
if [ -n "$STY" ]; then
    # Screen session.
    echo 'screen session'
elif [ -n "$SSH_CLIENT" ] || [ -n "$SSH_TTY" ]; then
    # SSH Session
    # http://serverfault.com/a/506267
    echo 'ssh session'
else
    # Main session
    echo 'main session'
    ~/run.sh
fi
Create a file named run.sh in your home folder. This starts the 3g and reverse tunnel scripts in separate screen windows.
#!/bin/bash

# Tip: You can press "Ctrl + a" twice to switch between windows

# Starts a new detached screen session (-dm) named "pi" (-S) with the
# window title "3g" (-t), and runs 3g script
screen -dmS pi -t 3g /home/pi/3g.sh

# Connects to existing session "pi" (-S) and runs command (-X).
# When screen is run within screen, it creates a new window named "tunnel" (-t)
# in the current session
screen -S pi -X screen -t tunnel /home/pi/tunnel.sh

# Attach to 3g window
screen -r pi -p 3g
Setting up 3g
To connect to 3g, we’ll need to install Sakis3g. I’ve left out the steps because getting Sakis working really depends on your modem and cell provider. It’s a good idea to try Sakis3g first in interactive mode.
After that, install UMTSKeeper to automatically reconnect in the event of a connection failure.
Create a file named 3g.sh in your home folder. You’ll need to modify the sakisoperators to fit your configuration.
#!/bin/bash
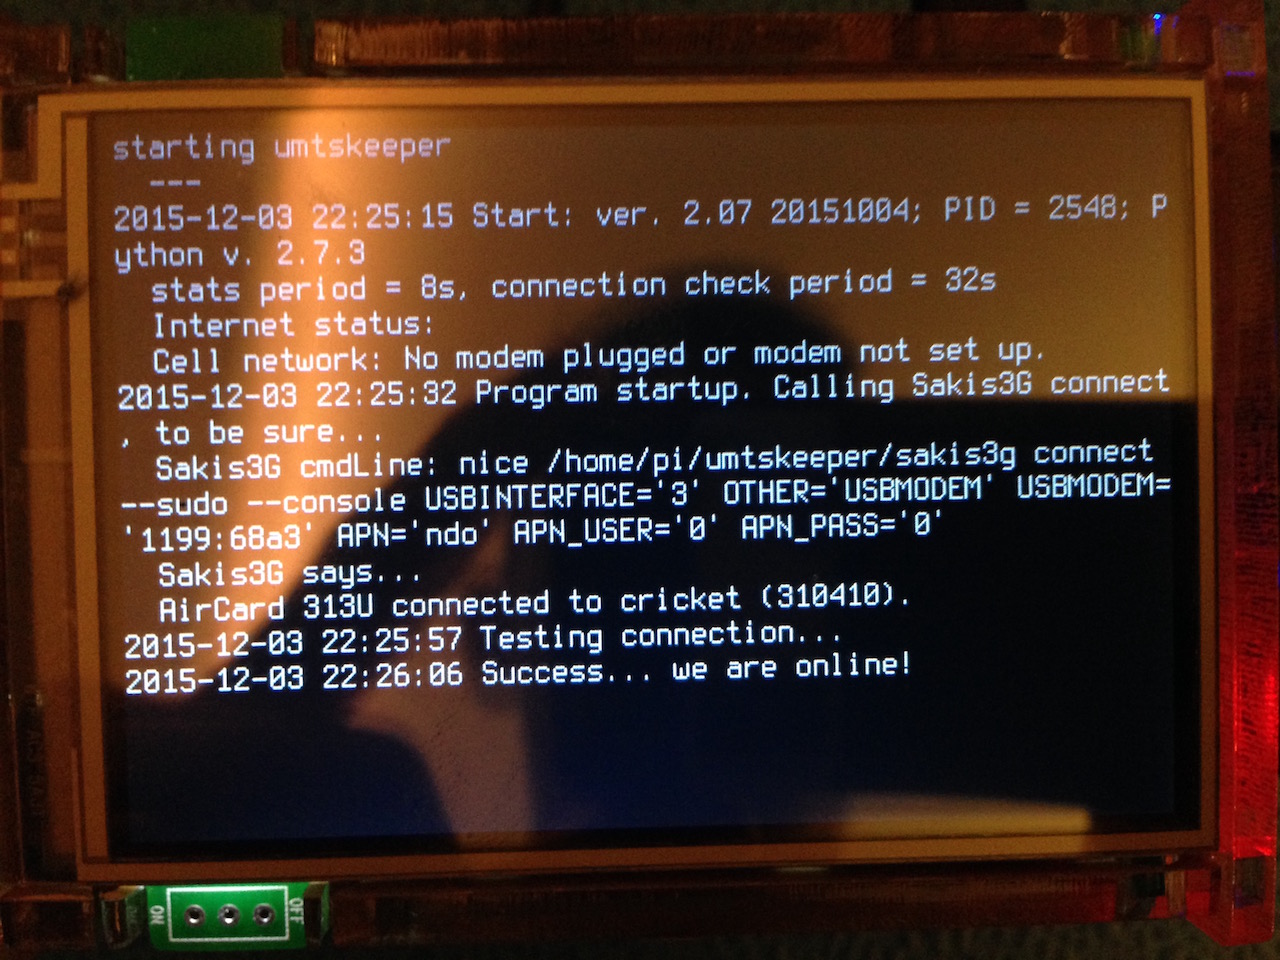
# Start UMTSKeeper & Sakis3g
echo 'starting umtskeeper'
# Using Orange Senegal defaults:
sudo /home/pi/umtskeeper/umtskeeper --sakisoperators "USBINTERFACE='3' OTHER='USBMODEM' USBMODEM='1199:68a3' APN='internet' APN_USER='internet' APN_PASS='0'" --sakisswitches "--sudo --console"Reverse tunnel setup (server)
First, you’ll need to set up a linux server. I used a $5 / month instance at Digital Ocean.
On your server, add this to /etc/ssh/sshd_config so that the connection times out after 3 x 60 seconds of unresponsiveness.
ClientAliveInterval 60
Next, generate an SSH key on the Pi by following the guide here. Then copy the Pi’s public key to ~/.ssh/authorized_keys on the DigitalOcean server. This will let the Pi login to the server without a password.
Reverse tunnel setup (Pi)
Back to the Pi. Add the follow to ~/.ssh/config so that the client exits after error (usually it will hang) and disconnects after 3 x 60 seconds of unresponsiveness.
ExitOnForwardFailure yes
ServerAliveInterval 60
Test out the reverse tunnel by running this command on the Pi. You’ll want to replace the IP address with the address of your own server.
ssh -R 22222:localhost:22 ubuntu@159.203.95.60
If this works, you can log into your server (using a separate terminal) and connect to the Pi via this command:
ssh -p 22222 pi@localhost
Next, we’ll install autossh which enables automatic reconnection of ssh sessions:
sudo apt-get install autossh
Create a file named tunnel.sh in your home folder. This script waits for the 3g interface to go live before starting the reverse tunnel. It’ll also restart the tunnel in the case of an unclean disconnect.
#!/bin/bash

while true;
do
    echo 'waiting for ppp interface'
    # Check to see if ppp0 is the default gateway
    # http://stackoverflow.com/a/15973156/86568
    if [[ `ip -4 route list 0/0` == *'ppp0'* ]]; then
        echo 'starting reverse tunnel'
        autossh -R 22222:localhost:22 ubuntu@159.203.95.60
        echo 'tunnel connection error'
        sleep 60
    fi
    sleep 5
done
That’s it! If everything works correctly, you should be automatically connecting to the reverse tunnel each time the Pi boots up.
Re-published from: https://csytan.com